Sweet Fabric
:
flip
How to make a granny shrug...
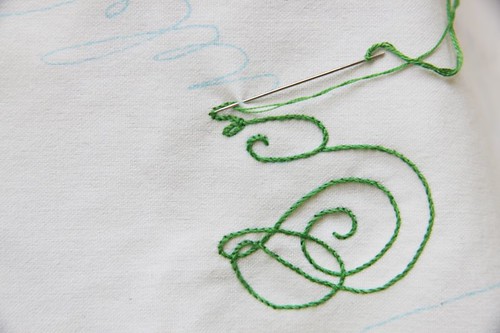
How to Stem Stitch (sort of)...
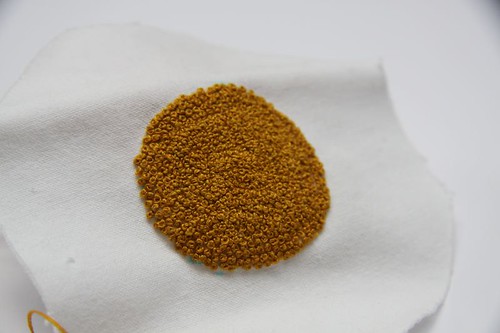
How to embroider a French Knot...
Tour my house...
A quilt preview...
How to make a 3D scrappy quilt square ...
How to fold a fat quarter...
NEXT >>